
Back at the start of 2022, I reviewed the be quiet! Dark Rock TF 2 CPU Cooler, review link here! Comprising of 2 amazingly stealthy 135mm Silent Wings, this beast of a heatsink lowered my CPU temps amazingly. My only issue was the size of the unit, as it made releasing the GPU tricky due to it covering the release lever.
While I’m not the sort of person who changes their GPU that often, I was keen to see how a liquid-cooled system would be in comparison. From fitment and aesthetics to performance.
When be quiet! kindly sent me their Pure Loop 2 FX All-in-One to have a play with, I was like a child at Christmas!
Liquid Cooling Baby!
Would the Pure Loop 2 FX cool my CPU down further and allow me to reclaim some of the space from the motherboard? Read on!
Design
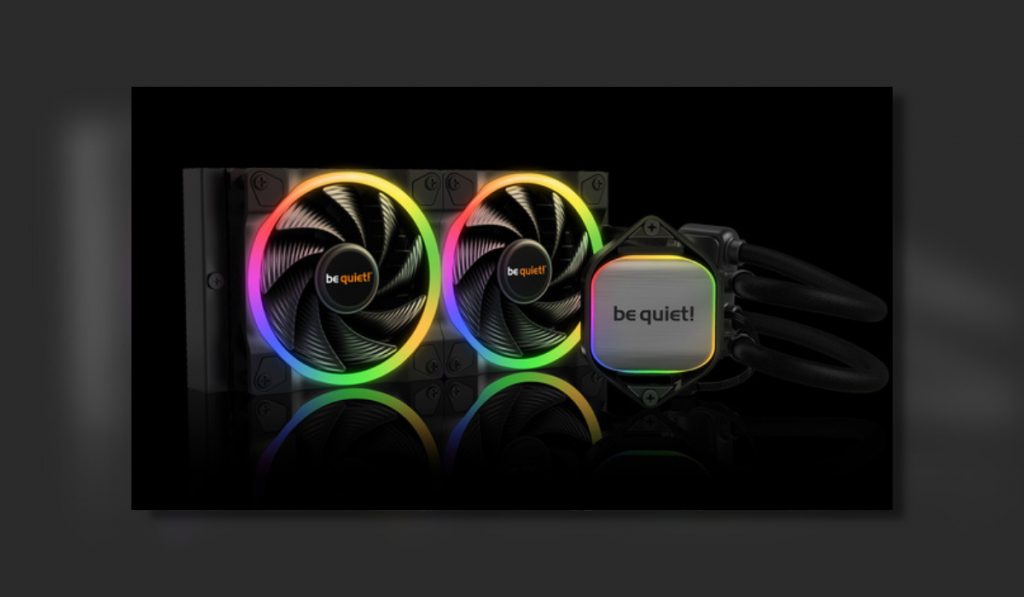
be quiet!’s Pure Loop 2 FX comes in 3 sizes. 240mm, 280mm and 360mm. The various sizes are designed to also aid those who wish to overclock their CPUs, therefore generating more heat to be discharged.
Each AIO comprises of a radiator with up to 3 iconic PWM ARGB Light Wings. From the radiator, a decoupled PWM pump sends the liquid via black braided hoses to the stylish aluminium and black cooling block that attaches to your CPU. The now warm liquid then travels back around the circuit through the fan-cooled radiator to dissipate the heat before starting the process again.
I received the Pure Loop 2 FX 280mm to test out. This version came with a 317mm long radiator and 2 140mm PWM ARGB Light Wings.
Out of the box, there is not too much to assemble. You are required to mount the fans to the radiator using the supplied screws, and then simply select where to install the radiator within your case. The AIO comes with the hoses, pump and cooling block pre-installed and also pre-filled. Handily, both Intel and AMD CPU mounts are provided to couple the cooler block to the motherboard. There is the all-important thermal paste (don’t forget that) and an included ARGB PWM Hub is provided to aid your cabling and ultimately, your personalised light show.
You also receive a spare bottle of cooling liquid to refill your system in a couple of years time as well as a 3-year manufacturer’s warranty.
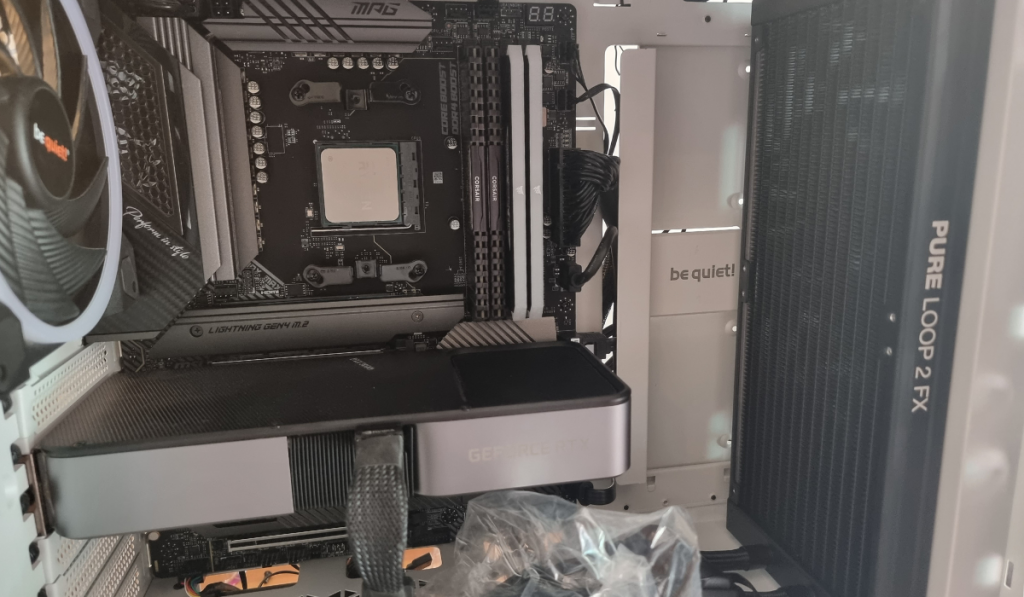
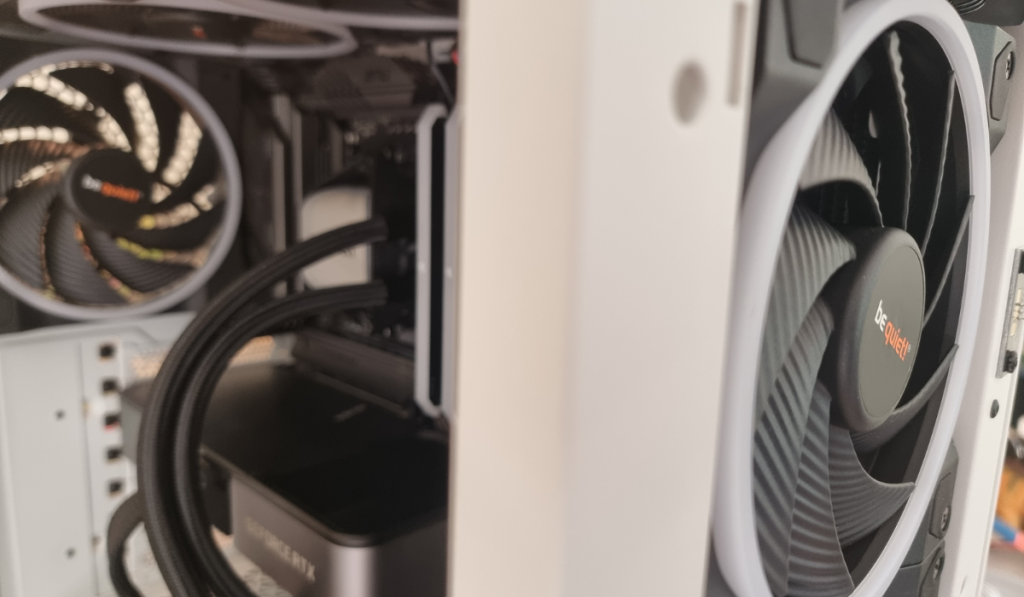
When it came to installing the radiator, the choice for my case was either across the top or at the front. Ideally, I wanted to install it onto the top of the case and exhaust the heat straight out. I did however hit a snag. I had recently changed my motherboard to an MSI X570S. While this was my first ATX board, fully filling the be quiet! PC case, the heatsinks on it were fairly large. This fouled the install of the 27mm deep radiator to the top of the case, as with the fans installed it gave an overall depth of 52mm, meaning that I had to mount it onto the front.
While there is some debate to be had around installing a radiator into this location, thus exhausting heat into the case, I did stumble across a few tech videos that proved that you were only raising the temperature within the case by 1 degree. Providing of course that you have decent exhaust fans installed!
I did have 2 140mm PWM ARGB be quiet! Silent Wings already on the front of the case, therefore demounting and installing the rad was an easy affair. Conscious that the pump and hoses were at the bottom of the radiator to prevent air bubbles from affecting the flow and eventually breaking the pump, it was all systems go.
I mounted 1 of the 2 140mm fans to the roof of the case to compliment the single 140mm fans that were on the rear and top. The heat will be exhausted!
The 400mm long flexible braided hoses from the radiator to the cooler block were sturdy, but could be manipulated to get the curve required in order to arrive nicely down by the CPU. Where I was swapping from the previous be quiet! CPU cooler, the mounts I had already installed onto the motherboard were the same size and therefore could stay. Bonus!
With a bit of thermal paste on to the back of my freshly cleaned up Ryzen 5 3600 CPU, I carefully positioned the cooler block and tightened the screws. I don’t know about you, but I always have a rush of worry when installing a cooler. Has the cooler made contact with the CPU? Is it on properly? Maybe it’s the electrician in me wanting to double-check everything all the time. Or am I just over-cautious with these things?
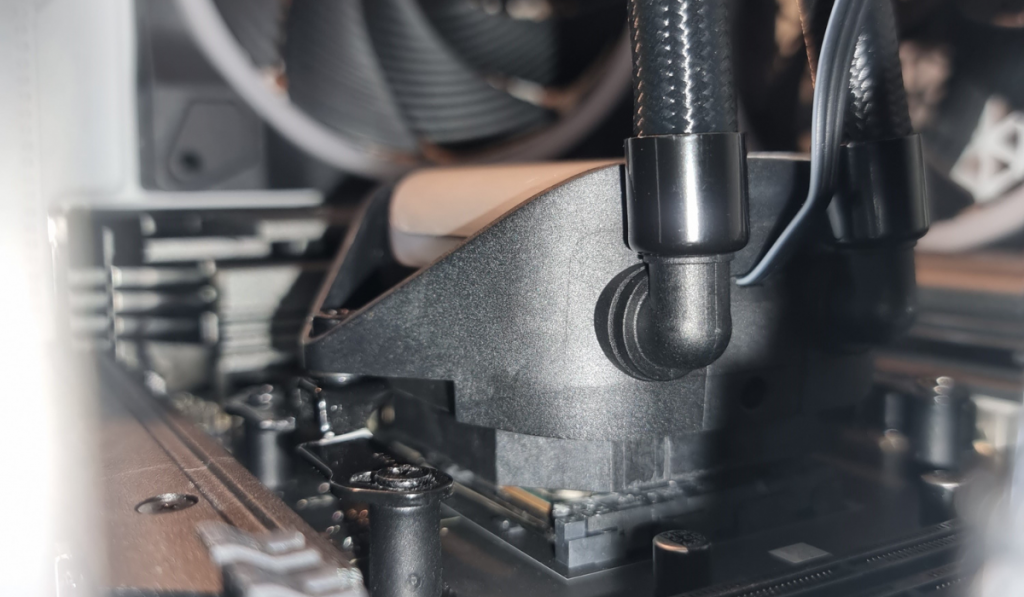
Once the elegant-looking cooler block was in place it was a matter of connecting the pump to the motherboard AIO pump header, along with the PWM Light Wing cables to their respective headers. The ARGB hub came in handy to combine both the fan lighting as well as the CPU cooler block ARGB.
The moment of truth was about to happen. Turn on time.
Performance
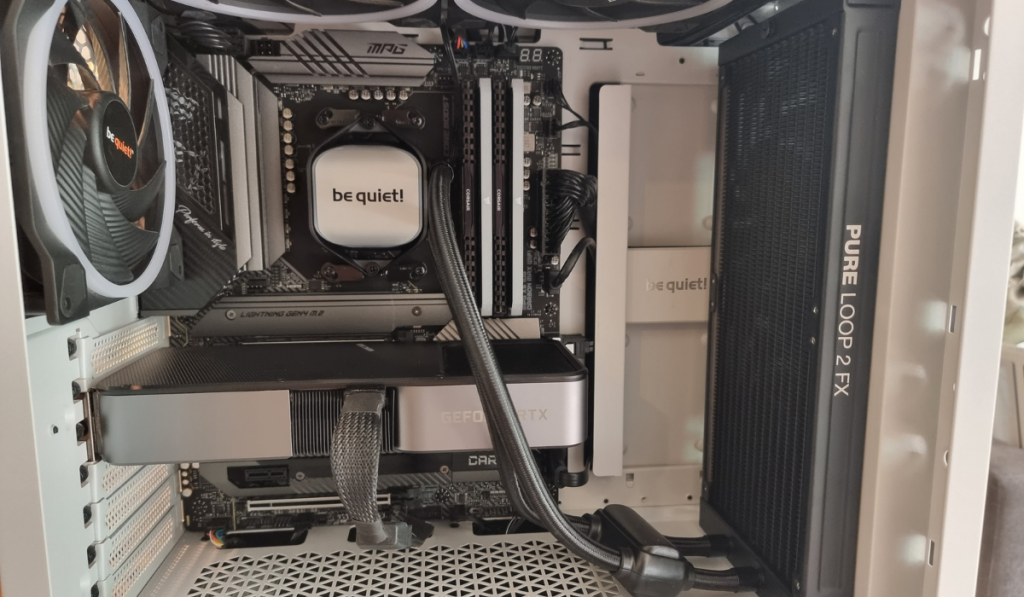
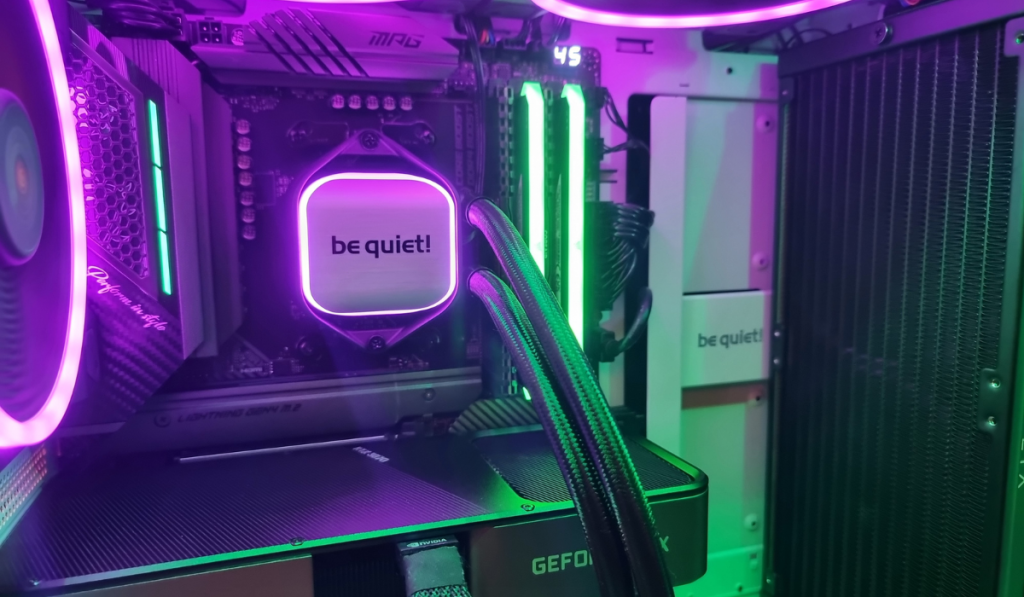
As I booted up the PC, the Light Wings came to life with a burst of light and more importantly, the blades turned. The central black writing of “be quiet!” upon the silver CPU cooler block was serenaded by the ARGB lighting that glowed from around the perimeter. I was in awe of how spacious the area around the CPU now looked. While I enjoyed the behemoth look of the Dark Rock TF 2, giving a domineering industrial look to my PC, I now had a futuristic entity in play.
I have been used to the quiet purr of the Light Wings, however, I was amazed at the fact that there was little to no noise coming from the pump. Was it even working? I checked the temps and everything was thankfully steady and the pump was running at 5400rpm.
I was intrigued as to whether a PWM curve was required for the pump, given that it was PWM-enabled. While the fans were set to a PWM curve to spin up faster depending on CPU temps, the pump sat happily at 100%.
I contacted be quiet! to see if this was all ok and they replied that having it set up as I did was absolutely fine and should work very well. The PWM pump control was an option, but not necessary.
Time for some stress tests!
With the Burnintest app installed, I put the Pure Loop 2 FX through its paces with some gruelling 100% CPU loads that lasted for an hour each time. The results were interesting to say the least.
With the PC sitting idle, the CPU was around 45 degrees while under 100% load, the maximum recorded temp for the CPU core was 64 degrees. When compared to the Dark Rock TF 2 it was surprisingly only 4 degrees lower. For some reason, I was initially expecting it to be far lower due to the liquid cooling. Admittedly the Ryzen 5 3600 CPU is renowned for running hot. I remember having to change the stock Wraith cooler early on in my build due to some whopping 85 degree temps that were being hit at times.
I checked once again with Florian in the be quiet! technical department who confirmed that my load temperatures were “excellent” for my CPU. Reassured, I could therefore only conclude that the Pure Loop 2 FX was slightly better than the Dark Rock TF 2 in temps, however, when you remember the size of the heatsinks, double 135mm fans and copper tubes running to the cooling block, it suddenly dawns on you how amazingly engineered the Dark Rock was to be on par with a liquid-cooled system.

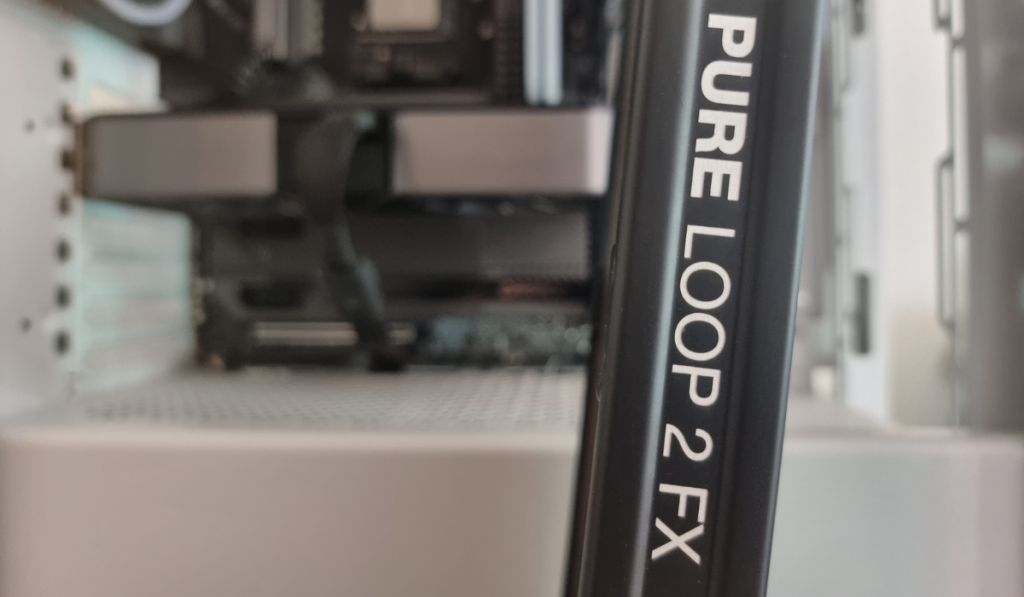
Aesthetically the Pure Loop 2 FX looks amazing inside the PC case. Memory, headers and GPU slots can all be easily accessed and there is a sense of space. Ok, the black front-mounted radiator sits back slightly however it is more of a feature with the white writing of “Pure Loop FX 2” running down the side for all to see.
Final Thoughts
The assembly and installation of be quiet!’s Pure Loop 2 FX was a doddle with easy-to-follow instructions. In fairness, I probably spent more time on the cable management behind the scenes than on the actual what-you-see part.
The Light Wings are fantastically quiet and I would recommend their 140mm PWM fans to anyone. Having had quite a few different types since my initial build, these have been by far the quietest and best performing.
The pump doesn’t make any noticeable noise and the hoses are long enough to comfortably reach the CPU without any strain to them.
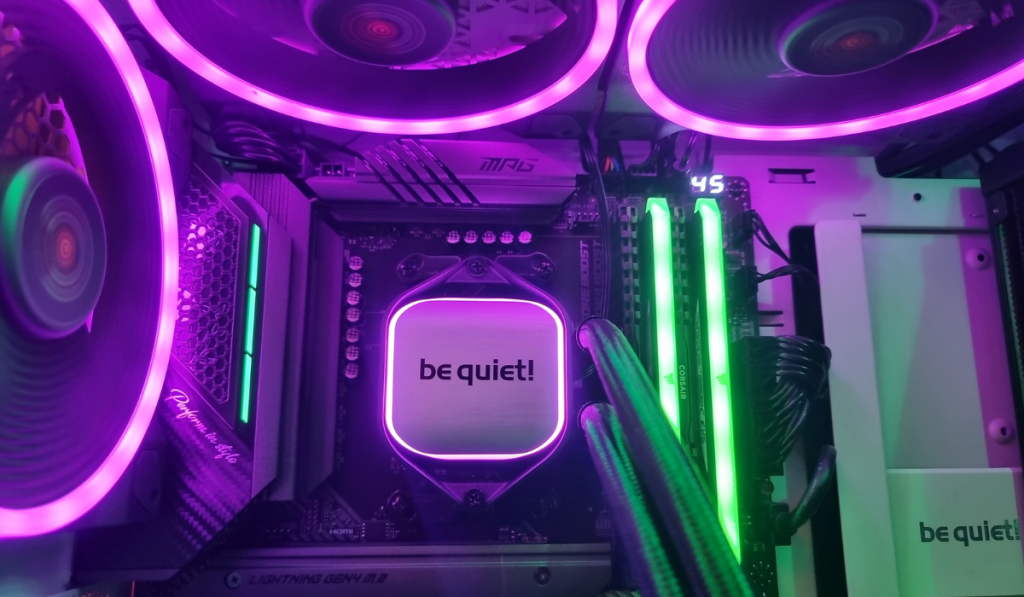
The ARGB light show that you can produce with the fans and cpu cooler block allows you to personalise your rig to your heart’s content. After all who doesn’t like a bit of atmoshphere setting when gaming!
The temps achieved through liquid cooling were slightly better than what I was already experiencing however ultimately I had the cooling of the Dark Rock TF 2 in a minimalistic-looking CPU cooler, allbeit, spread out across the radiator, which just looked so much better. Having taken away 2 135mm fans and added 1 more 140mm to the roof of the case, the noise levels had not really altered that much. That said, when idling, the PWM fans do ramp down a lot more to almost nothingness which is very pleasing!
The Pure Loop 2 FX 280mm is available from £129.95+vat via OverClockers. If you are umming and arrrring about what to get for Christmas this year. Put it on your list. You won’t be disappointed!
The be quiet! Pure Loop 2 FX 280mm receives a Thumb Culture Platinum Award!

Disclaimer: A sample was received in order to write this review.
![]()
YouTube | Facebook | Twitter | Instagram | Discord | Podcast